Another Classroom Remodel

When I walk into a new teaching space, I love the opportunity to try and make the space as welcoming and calming as I possibly can.  I haven’t quite mastered this craft yet, however, as a general rule, I try to make sure that I don’t display things in our classroom that I wouldn’t want in my own living room.  The challenge can sometimes be working with what is already in the room, but when I am mindful of this, I know that at the very least, I am not bringing more “noise” into our learning space.  (If you are interested, “before” pictures can be found at the bottom of this post).

This year, I took some time to explore other opportunities in our district for the first few months of the school year before accepting my current position.  At the time of this post, I have been in this space for 12 teaching days so I still consider our space a “work in progress”.  As my students and I are continually growing, learning and evolving, can any space ever really get to the point where it is considered “done”?  As it currently sits, I feel that the space is already becoming one that provokes curiosity, exploration and independence.  As you look through the images below, you will notice some large areas devoted to play as this is something I truly value when working with early learners.

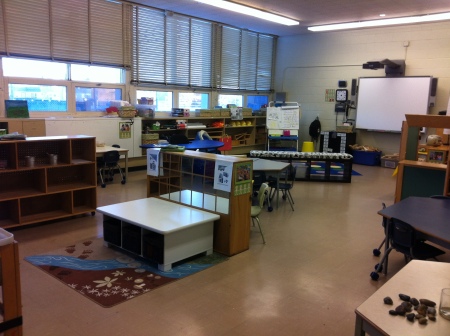
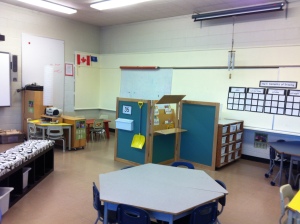
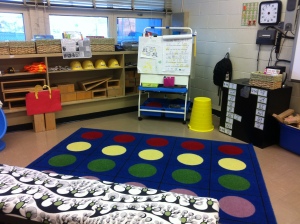
When you enter our space, this is the first impression you have from the door:

View from door

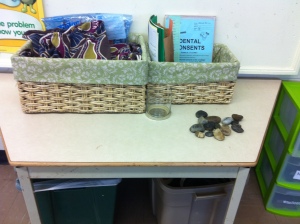
To the right of the door, there is a little table.  One basket is to collect library books and book bags.  The other is for agendas and home reading folders.  (The rocks all have student names on them.  As they put their agenda in the basket each day, they also put their rock in the jar.  My “helper” can then read the names on rocks still out and gently remind those students to get their agendas).  Under the table is our juice box recycle bin and a bin where we keep indoor shoes.

Agenda Bin

The next thing you see as you make your way counter-clockwise around the room is this blue table and a shelving unit with our “tub toys”.   Behind the green divider, is our “house centre”.

Blue Table

Here is another view of the “blue table” from a little further back.  In this photo, you can also see our little white table which is currently being used for smaller blocks and in the bottom lower right corner is the edge of a pellet table we are currently using.

Block Table

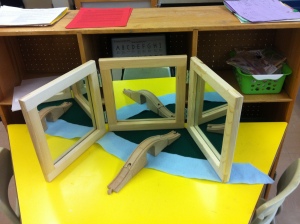
Behind the mirror shelf (pictured above), we have a little yellow table.  Currently this is our “story-telling” area where students use puppets they have made (or other finger puppets) to retell stories we have been reading in class.  Can you tell that their current favourite is “The Three Billy Goats Gruff”?

Drama Centre

Next to the “blue table” is our “house centre”.  As you can see, it has quite a big footprint in our learning space.  

House Centre - From Outside

From inside the house, this is what you see:

House Centre - Close

There’s the kitchen:

House Centre - kitchen

an eating area, sleeping area for the babies and the closet for all the clothes (even some of the “mail” from the mailbox that was forgotten on the floor made it into this picture!):

House Centre - closet and cradle

and of course, the living room with lots of books to read:

House Centre - living room

Helping to create a “boundary” to our house, is our listening centre:

Listening Centre

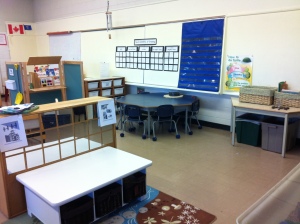
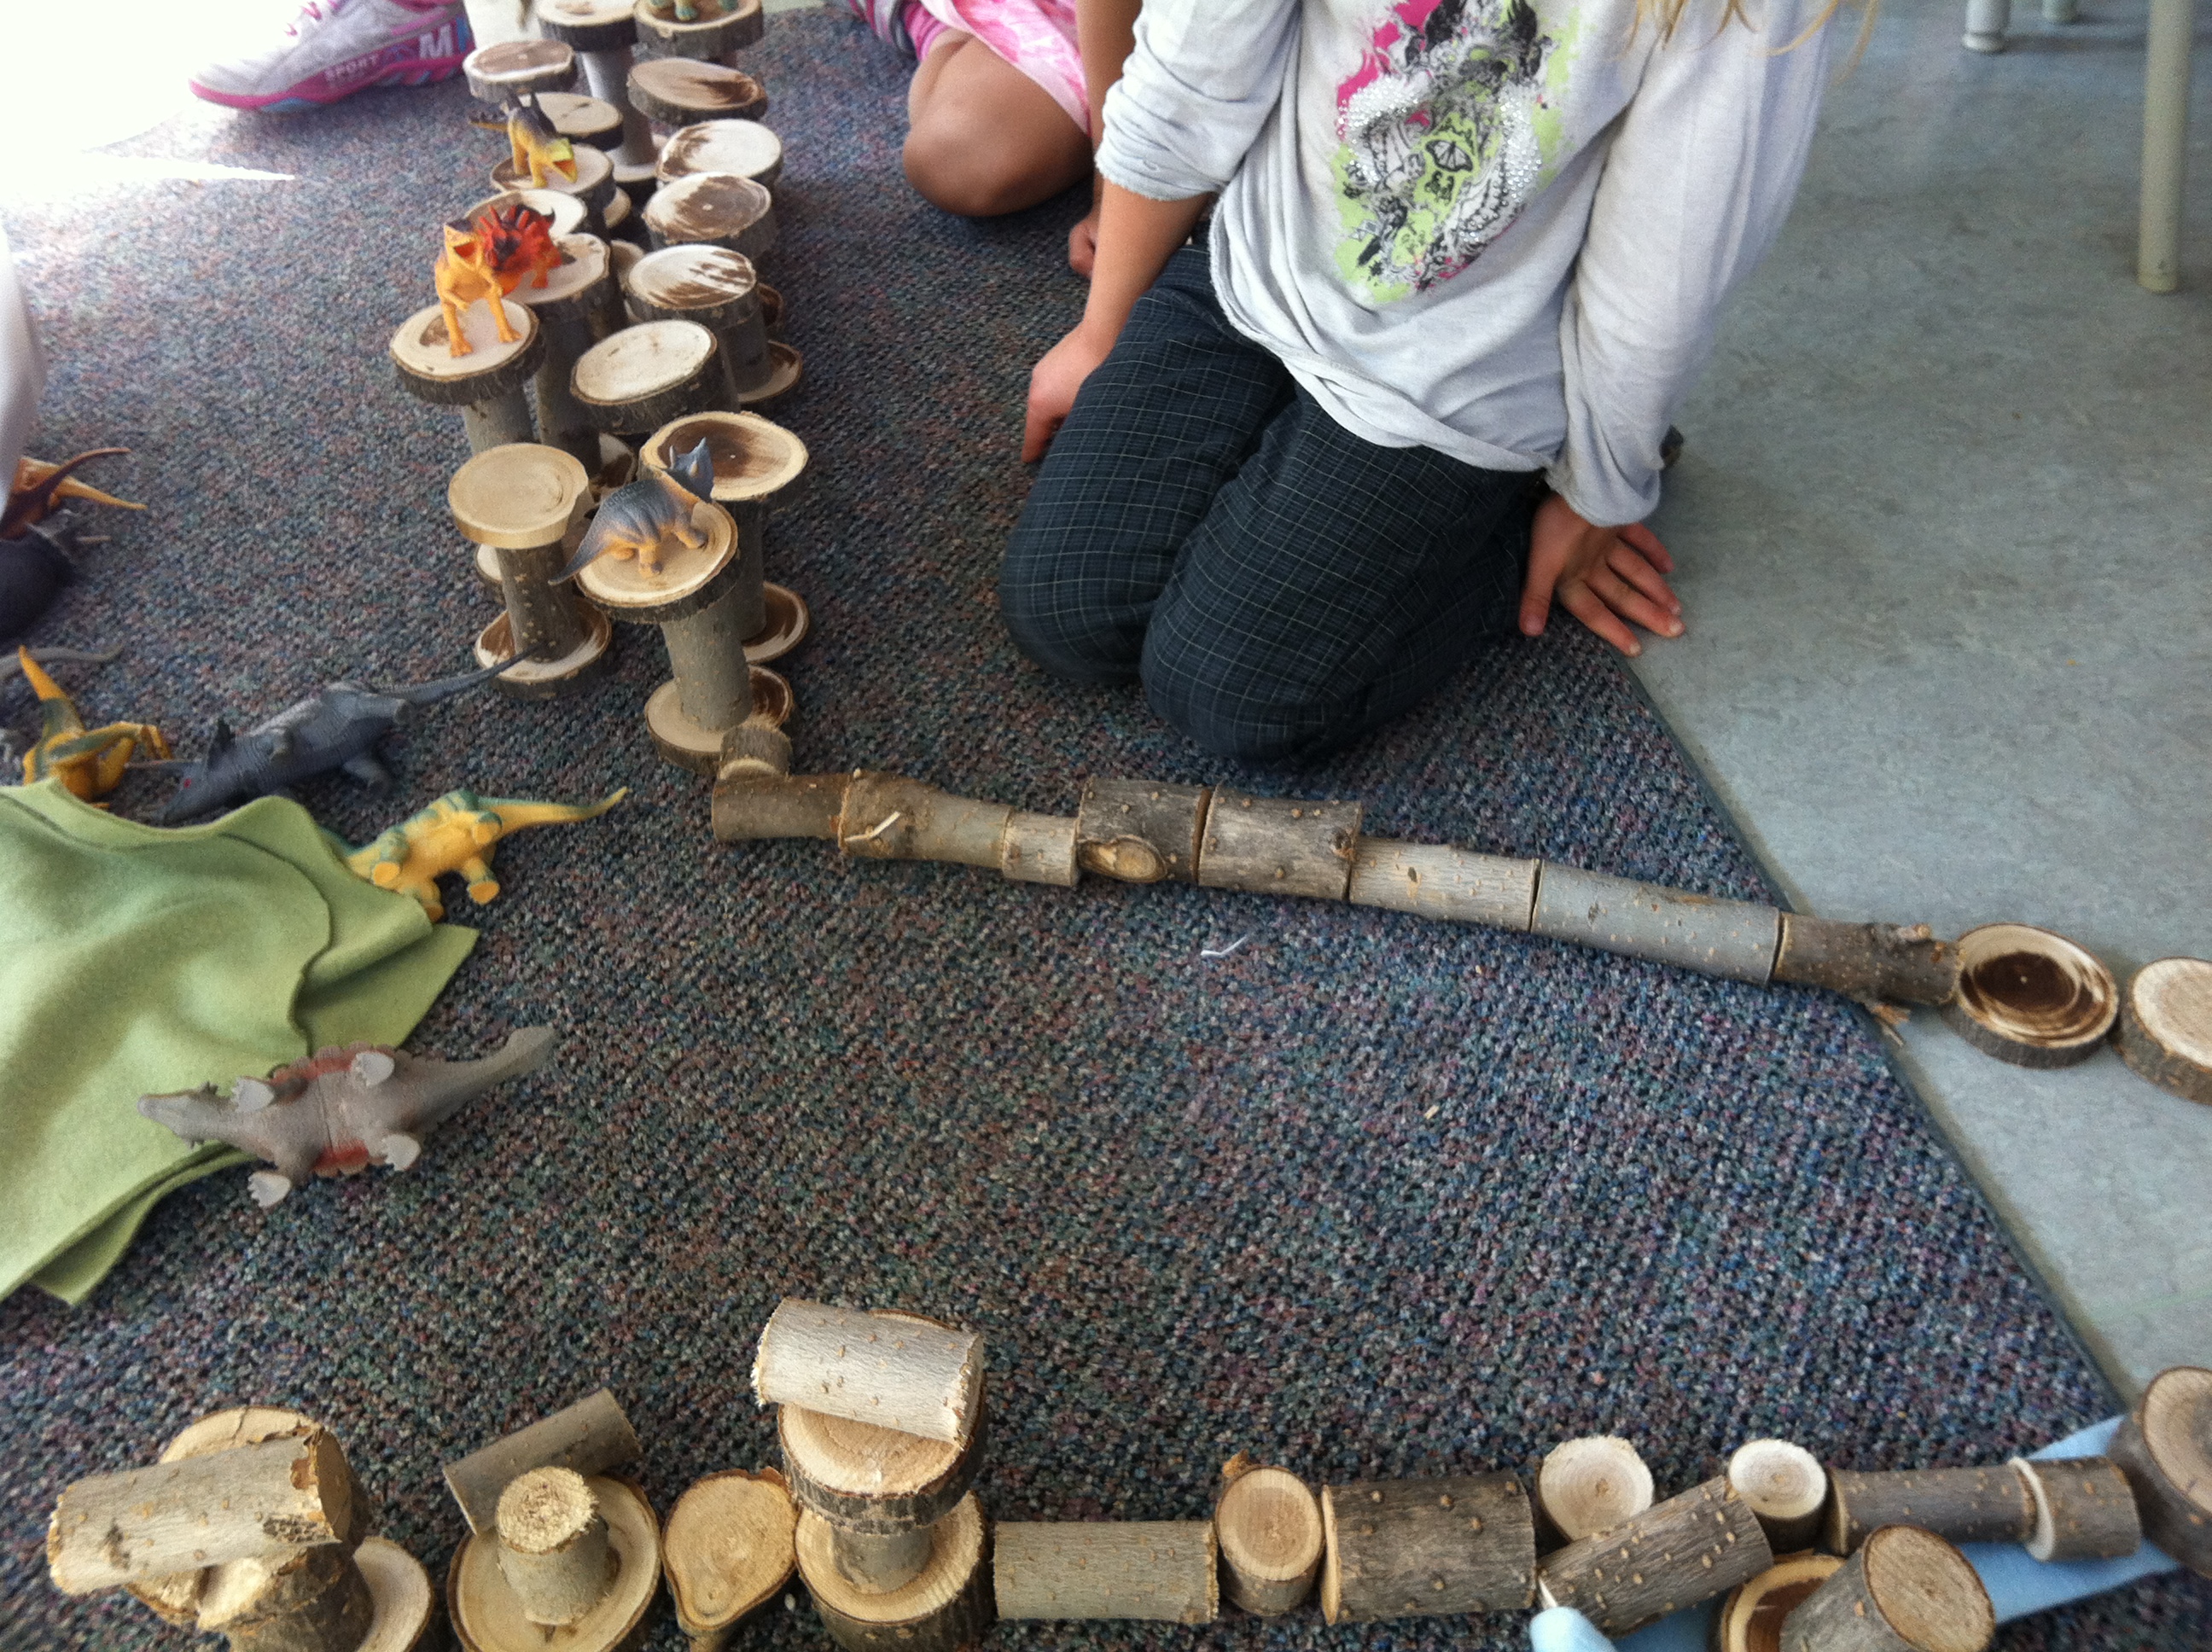
Next comes our carpet and big block area.  Along the wall under the SmartBoard are 3 big buckets with our smaller wooden blocks and on the shelves under the windows are our big wooden blocks (The sign on the block left out shows they have been busy building McDonald’s this week!).  The bench in the foreground stores bins for trains and cars, etc.

Carpet Corner

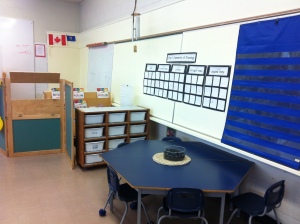
On the black filing cabinet is our “daily schedule”: 

Daily ScheduleThe last big area as you move though our space is our “art” space.  In this first photo, you can see a small table that currently is being used for playdoh as well as our big art table.  

Art and Playdoh Table

Mounted on the shelf (in the bottom right corner) is a rack to help organize some of the drawing and colouring materials that are used most often.  In this picture, you can also see our coat hooks and the pellet table that is currently out (it is on wheels so we roll in to this space for centre time and then tuck it in by our easel for the rest of the day so we have enough room when we come in or are getting ready to go back outside).

Art Centre - bins

And lastly, you see the easel, counter and sink and our drying rack.

Art Corner

And that is pretty much it.  As you can see, it is a busy place with plenty going on.  I hope you enjoyed the tour and maybe left with an idea or two to use in your own space!  As always, I welcome any comments or suggestions below.  

The “Before” Pictures (in case you were curious where this all started from):

After the previous teacher had left with all her stuff, the room was pretty much a blank canvas, waiting for my touch!  The first thing I did was have the “teacher desk” and some other unwanted furniture removed from the room.  This is what was left:

In this photo, you can see the entrance door to our classroom:

Before - Entrance

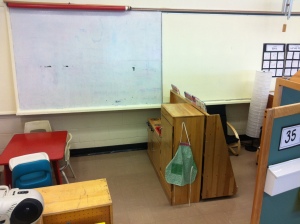
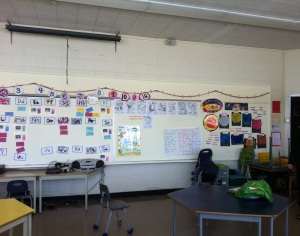
Turn counter-clockwise and this is our bulletin board area:

Before - Bulletin Board

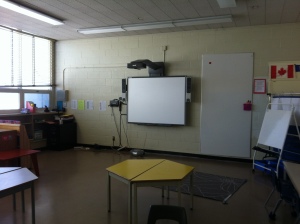
Turn counter-clockwise some more and you see the gathering area and smart board.  (The empty corner by the Smart Board is where the teacher desk was once).

Before - Carpet Corner  

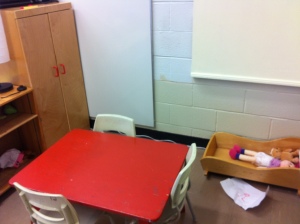
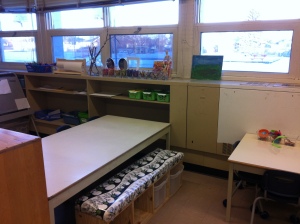
Continue to turn counter-clockwise and you see the back nook with a sink and counter.

Before - Art Corner

Developing fine motor skills through play

Fine motor night activities

When a student starts kindergarten and has a hard time holding a pencil or printing his/her name, many of my parents are very keen and willing to help out at home in any way they know how.  They usually offer to do things like printing practice or buy workbooks and are open to any other suggestions I may have to help their child.  I often find myself repeating to parent after parent that, ironically, printing practice is often one of the least effective ways to help kindergarten students who are struggling, improve their printing.  In order to print (or draw, paint, cut, etc.) effectively, students need to have developed hand dominance as well as good muscle strength and control in their shoulders, hands and fingers.  There are many simple things parents can be do with their children to help develop these muscles.

This year in order to help our parents best help their children at home, we decided to try something new.  We held a parent and student evening workshop, by invitation only, targeting our students who were most in need of extra support and practice.  We had an amazingly positive response.

We started the evening in one classroom with the parents while their children played next door.  Parents were all given this “Developing Fine Motor Skills” handout and we discussed some of the simple things they could do at home with their children to develop hand dominance, shoulder stabilization, hand and finger strength and finally, better fine motor control.  After our short presentation, children were given a passport and were asked to complete at least 5 of the 12 stations with their parents.  Parents had the job of identifying how each of the activities they completed helped develop fine motor skills (they could refer to their handout if needed!).

Once done, students could turn in their passport for a goodie bag that was full of fine motor activities to do at home.  The pictures below show the goodie bags we created for each student.

OT Night - goodie bag      OT Night - Goodie bag 2b

At the end of the evening, students left excited by the chance they had to play with their parents at school and parents left with a better understanding of simple things they could do at home to help their child.

Let’s play…

Light table

“Play is the road to childhood happiness and adult brilliance.”

– Joseph Chilton Pearce

As a kindergarten teacher, I often get questions from incoming parents about how my students spend their time in our classroom.  I tell them that we spend a good part of our day learning through play in centres, and by that, I mean they actually get a significant chunk of time to play.  On any given day, some of the choices my students may have include building with blocks or trains, exploring coloured water with funnels and pitchers, “baking” cookies with playdoh, giving a “manicure” at the salon or exploring with paint.  What is setup in our centres often comes from conversations the children have either directly with me or that I overhear between them.  I value play in early learning and I believe in giving my students choice in where they play, what materials they use, who they play with and how long that play lasts.  I believe “choice” is a key element in play because I know firsthand that what is play for others (like going for a run) is work for me and things that I consider to be play (like writing this blog post) might be work for many others!

If you are interested in learning more about play and learning, there are many great resources out there.  As a starting point, try watching Stuart Brown’s TED Talk or reading his book Play: How it Shapes the Brain, Opens the Imagination, and Invigorates the Soul.  You never know, it just may change the way you think about play.

If you have a different favourite resource about play, please share it in the comment section below.  Thanks!

Tree cookies and fabric – two simple things to add to your block centre

Last summer, while surfing the internet, I came across the idea of “tree cookies” and decided they would be something cheap (so cheap, they’re FREE), interesting and worthy of adding to my block and building centre.  What is a tree cookie, you ask?  Really, it is just bits of cut up tree branches.

So as I trimmed my trees in my backyard, I saved the nicer branches and cut them into small pieces.  I then put them in a bin at my block centre.  (As you can see I made some that were short and fat and others that were long and narrow).

class play - tree cookies 2

I also added bits of fabric (polar fleece, to be exact) that I had cut into strips, rectangles and oval-ish shapes.  Then I waited to see what happened.  One day, this is some of what I saw:

2012-09-24 14.47.49 tree cookies - dino paths 1

tree cookies - wood forest

The fleece became rivers and grasslands.  The “tree cookies” became pathways, bridges and forests…

tree cookies - water falltree cookies - river

The shelf in the block area also helped create a waterfall for the dinosaurs to play in and hide behind.

Tree cookies and fabric, what simple fun!

Hurray for Learning

learning big logo

Now that I have dabbled with blogging for a bit, I realize that I have many ideas to share that don’t fit my “Hurray for Play” vision.  I have decided to create a second blog, “Hurray for Learning” and from today onward, I will separate “learning through play” posts from “language learning” posts.  To check out my other blog, please go to Hurray for Learning.

Top 10 arrrrr-t and craft activities to do as you set sail on your next pirate adventure

10. Pirate hats – Print and copy the pirate hat template from www.learningenglish-esl.blogspot.ca  on 8.5″ x 14″ paper.  Once students have coloured and cut out their hats, staple them in the middle of a 2″ x 24″ strip, leaving about 2″ of the hat brim unattached on each side.  Fit to each student’s head and staple strip into a loop.

Pirate hat1

9. Eye patches – These super quick and easy!  All you need is a small piece of paper, some string and some tape.  I make a patch tracer out of cardboard for my students to use as tracing is a great 2-handed activity for developing hand dominance and building fine motor skills.

eye patch

8. Hooks – Roll a 12″ piece of tinfoil up, squeeze it to form a tight “rod” and shape that rod into a hook. Take a cup (we used black paper cups here) and cut an “X” in the bottom.  Push about 3″ of the tinfoil hook through the “X ” in the cup to create a “handle” to hold on to on the inside of the cup.

Hook

7. Telescopes – All you need for this is a paper towel roll, some paint, glitter and some white glue.  For this one, I mixed the white glue into the yellow paint so that students could dip the ends of their telescope into glitter (and have it stick) once they are done painting.

Telescope

6. Noodle necklaces & tin foil earrings – Every good pirate needs some jewels.  Our pirates hang their tin foil loop earrings around their ear with an elastic band and we use dyed pasta to make our necklaces.  When doing threading activities with string, try wrapping masking tape around the end of the string to prevent fraying.  To learn how to dye pasta, click here.

Pirate necklace

5. Treasure maps – Have students draw their treasure maps with wax crayons.  When they are done drawing, have them paint their maps with watered down brown paint, then rinse them in a bucket (or sink of water) and then leave to dry.  (You can also dye them using tea however they need to soak in the tea for a while and this can be less efficient if you are working with a classroom of children).  Once dry, my students crumpled them up to make them look really old and some added little rips around the edges.

Treasure Map

4. Paper bag treasure chests – These are quite simple to do.  For complete instructions, please click here.

Treasure chest

3.  Salt dough treasure – Make salt dough.  Have students roll the dough and cut it into circles (we use water glasses).  Texture and details can beaded to the “treasure” using things like thread spools, screws, nuts and bolts, nails, etc.  Once cooked, paint with gold acrylic paint and finish with glitter.  Once dry, put them in your paper bag treasure chest for safe keeping!Treasure

2. Pirate pastel pictures – Once we have done lots of pirate crafts and built our pirate language and vocabulary, we transfer this knowledge to drawing pirates.  Before we go to paper, we do guided drawing activities on white boards.  I give my students big paper (12″ X 18″) to draw on and we use oil pastels to colour them (Kindergarten students have great success with pastels and love the ease of adding bright colours to their art work).

Pirate pastel pictures

1. Pirate ship pencil drawings – After you have looked at pictures of pirate ships in books (or online) with your students, brainstorm all the things that a pirate ship needs.  Give them a big piece of paper (about 16″ x 24″) and have them draw a ship with as many details as possible (we will also do guided drawing before we go to paper).  It is amazing what they can do when they have a big piece of paper to draw on.

Pirate ship 3

Pirate Ship

Quick Tip – Time Timer, A teacher’s best friend

In one of my early years of teaching, I was given a Time Timer to use in my classroom.  I have since moved schools and had to buy my own Time Timer.  I use it so often that I sometimes wonder what I did before my Time Timer days. 

time timer 2


I love this timer because it shows a piece of red for the given amount of time.  As time passes, the red gets smaller.  The visual is fantastic for students.  Some of the newer Time Timers also have a buzzer that, when turned on, beeps when the time runs out .

Here are 5 ways I use my Time Timer on a daily basis:

1.  At snack time – I set the timer for 12 minutes for snack.  Students know that when the timer runs out, everyone puts away the rest of their snack.

2.  As a clean up warning – I give students a 10 minute warning for clean up time.  It gives them time to finish up what they are working on and helps them switch from something they want to be doing (playing) to something I want them to be doing (clean up).

3.  As a signal to rotate centres – If a new center is overly popular, setting the timer to let students know when it is time to switch can be helpful.  (The only time I would limit time in a centre is when it is something new so that everyone has a chance to check it out before home time).

4.  As a reminder not to rush – For students who tend to hurry through a given task to move on to something else, setting the timer for a required amount of time can remind them to slow down and do their best work.  If they finish before the timer, they need work on improving their work until the timer runs out.

5.  And to keep me on track – Any time I tell students that they have __ minutes to do something, setting the timer helps me keep my word.  Before my Time Timer days, I would often say things like  “In 5 minutes…” or “You have __ minutes to…” and while I got busy working with students, 5 minutes could easily turn to 10 or 15 minutes without me even noticing.  When I set the timer, nobody lets me lose track of time!


If you are looking to buy your own Time Timer, they can be ordered from places like Spectrum or Scholars Choice or can be bought directly from most “teacher stores”.

Quick Tip – Tracing letters and shapes made easy

Looking for a simple way to practice drawing basic shapes or printing letters?  Try writing it in highlighter for your child to trace.  They can see what they need to write or draw and you can see their pencil lines when they are done.

Tracing highlighter

Here’s one more highlighter tip…..use a highlighter to let students know that they have a simple correction to do.  If they reverse a letter or number or forget a capital somewhere, simply print over top of the error with highlighter.  When they go back to it, it is easy for them to see their simple mistake, erase and correct it.

Paper chains with purpose

Everyone loves making paper chains, especially during the holidays.  Here is a new way to use those paper chains.  Try using those paper chains to countdown the days to Christmas (or to winter break for students who don’t celebrate Christmas).

In our class, we start with chains that are 25 links long on December 1st (our strips are 8.5″ long by 1.5″ wide).  As patterning part of our curriculum, we talk about all the different patterns we can make out of two different colours (AB, AAB, ABB, AABB, ABBB, etc.).  When they are done, we then hang them up on the wall, spread out around the classroom so that each child can easily get to his or her chain each morning or afternoon.

chain patternsEach day, we count the links left on our chains and then take off as many as needed (usually one per day but after a weekend, it may be 2 or 3).  We then count to see how many are left.  On the strips that we ripped off, we practice printing numbers.  (With older students, I would have them write a number sentence like “25-3=22” but with younger ones, we count and if there are 22 days left until Christmas, for example, we might practice writing “22” over and over again on one of the strips we just ripped off.

As our countdown continues, we get to watch our chains get shorter and shorter and shorter, we practice printing meaningful numbers for a purpose that is motivational for students, we count backwards (which, by the time we are close to 10, students have figured out the pattern and really understand what is happening) and in just 2 minutes a day.

Do you have a favourite way to count down to something special in your classroom?